Client Portals
Important Note:
The links in the Client Portal activation emails and in the Client Tasks emails are unique to each client.
- You should never share a client's link with anyone except your client.
- You should never forwarded yourself a copy of your client's activation email and login with your own account.
- If you have set yourself up as a client you should never send your personal portal link to anyone.
Send a Portal Activation Email
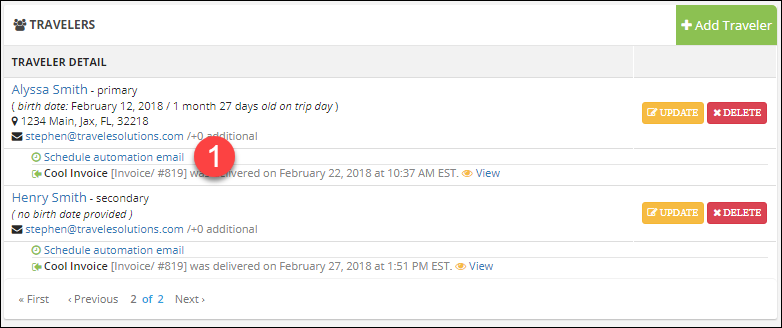
- Start from the Trip Information tab of a trip, under a client click Schedule automation email.
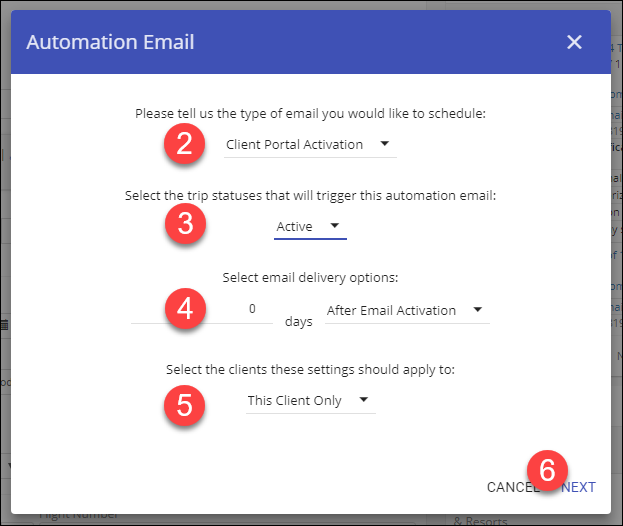
- Choose Client Portal Activation as the email type.
- Choose the Trip Status types you want it to apply to; you can choose multiple options.
- Choose the number of days and the event type.
For example, choosing 0 days After Email Activation will send the email right away. - Choose whether to send it to just this client or all clients.
Primary travelers will be able to provide information for all travelers,
secondary travelers can only provide information for themselves. - Click Next
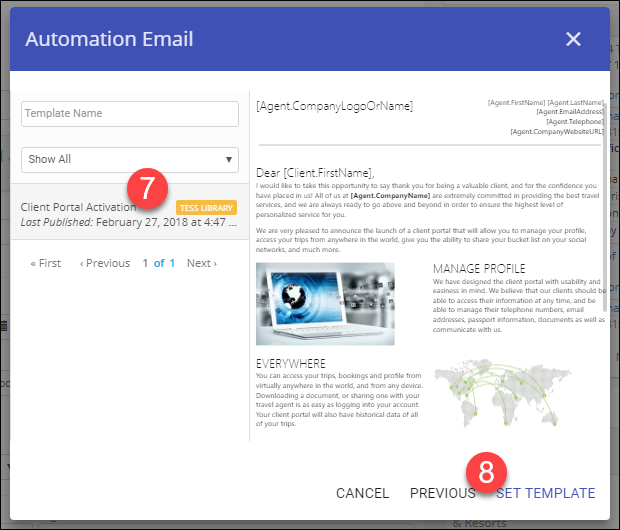
- Click the built-in email template, or use your own if you created one under Templates.
- Click Set Template.
The email is now schedule and you can see it listed under their name.
Accessing the Portal
Your client will receive an email with a link or button to access their portal.
In the standard email they can click on the "Activate Now!" button at the bottom.
The next section will be from your client's view.
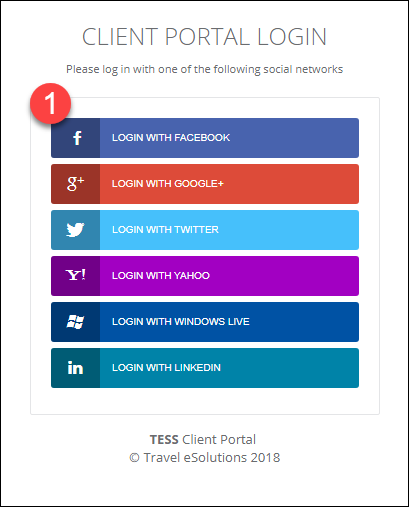
- Click on one of the online login providers to associate an account.
We are adding an email/password option as well,
however using an online account will simplify support for your clients.
If they are already logged into that account they will be taken directly to their portal,
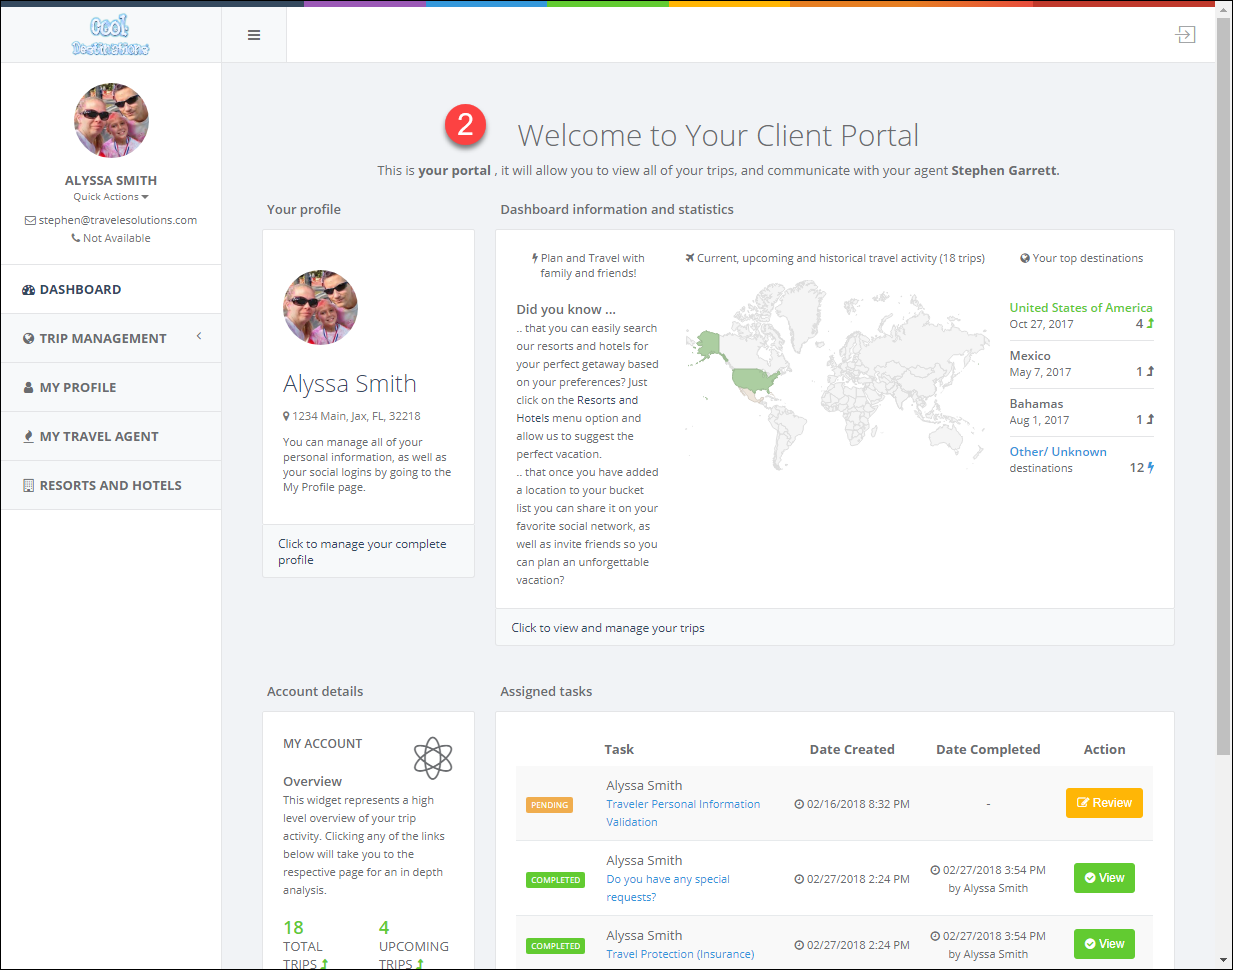
if not they will see a screen to log into their account. - On their Dashboard they can see their own contact information, statistics on their travel,
and their tasks that you have assigned - From My Trips they can see all of the trips you have planned for them.
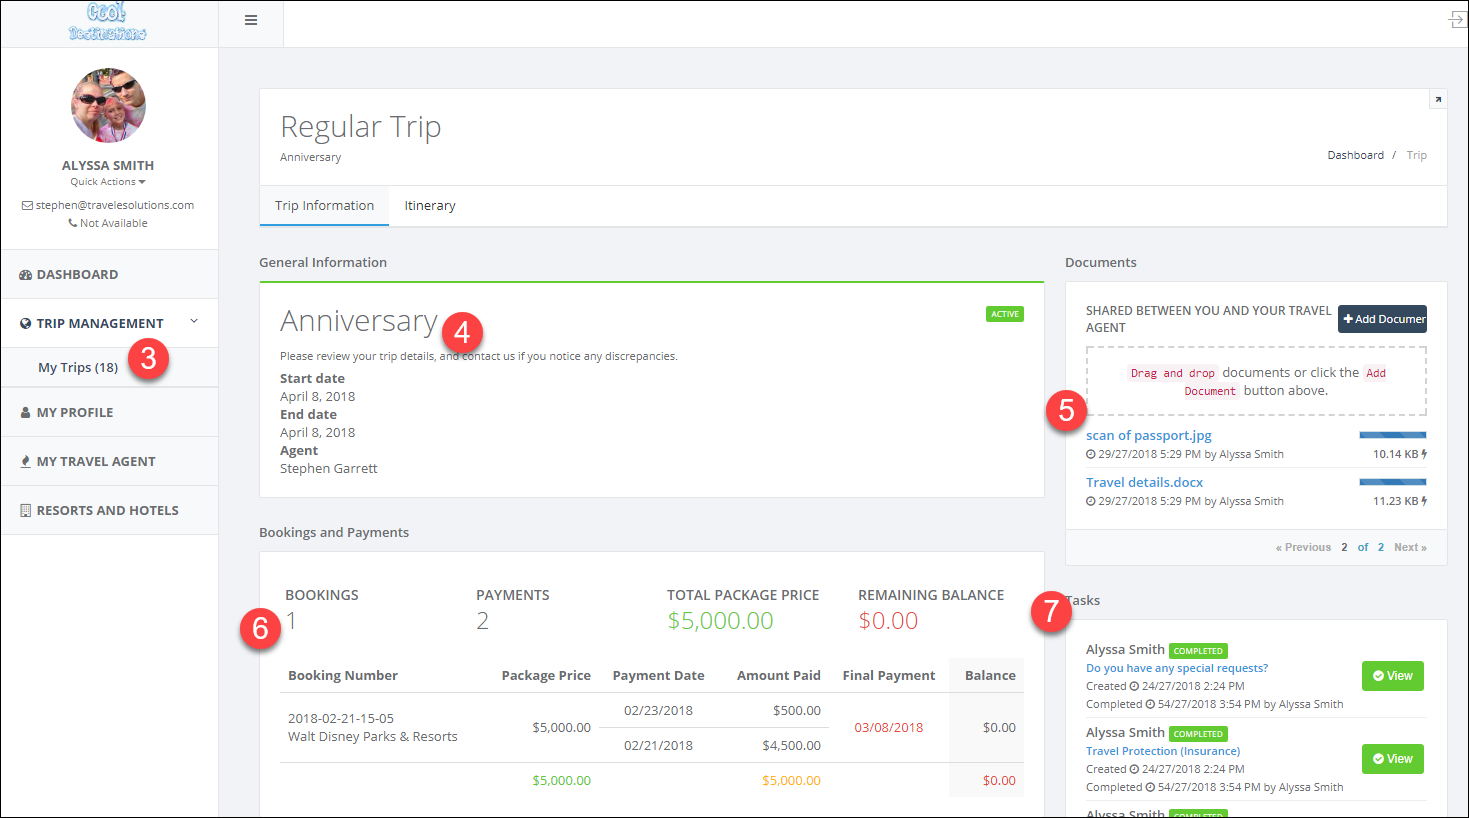
- Clicking through to a trip they can see an over view of the trip information.
- They can easily, and securely, share documents with you by simply dragging and dropping documents here.
You will see these documents on the Documents tab of the trip in TESS.
If yo have shared documents with your client they will see them listed here as well. - Your client can see a list of their bookings, final payment dates, and payments they have made.
- They can also view tasks that you sent them for this trip.
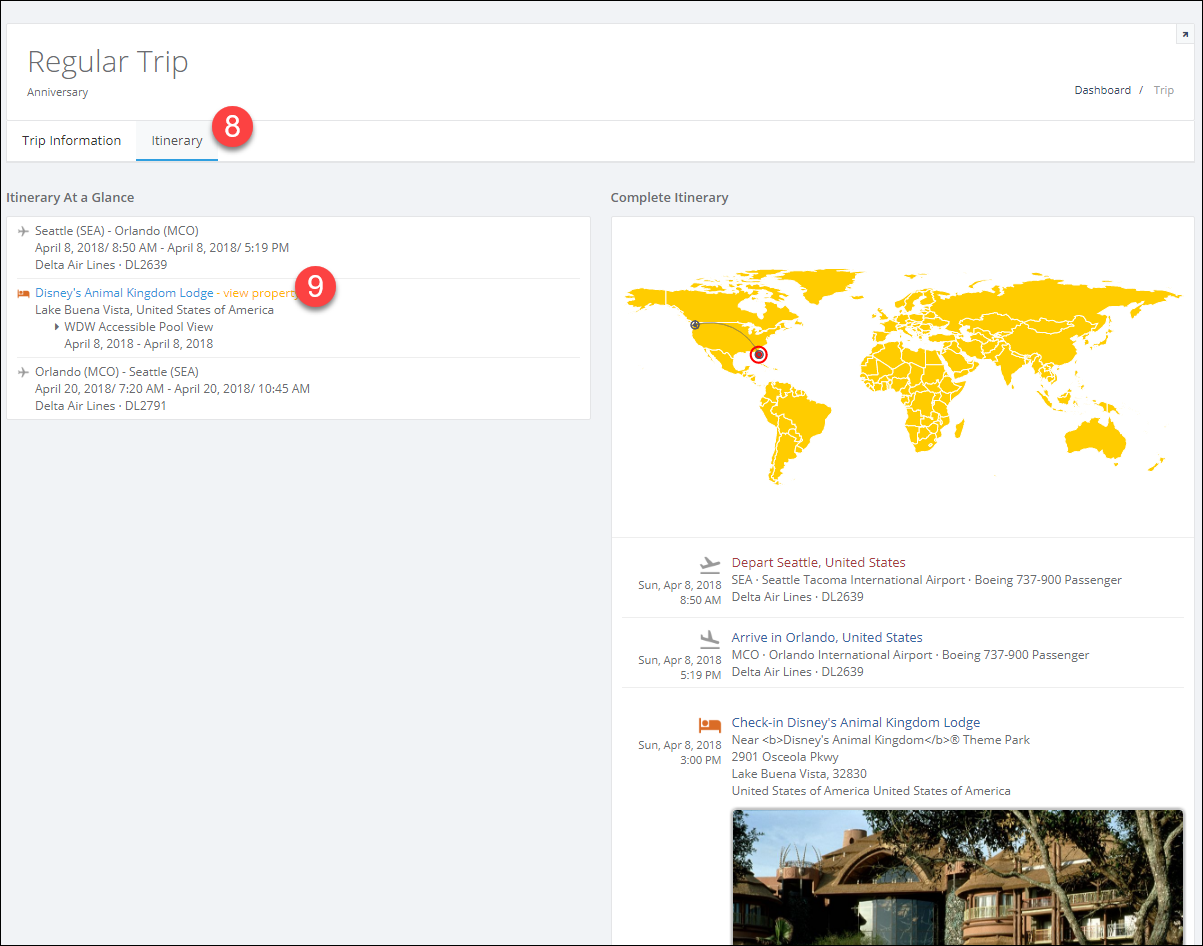
- Clicking the Itinerary tab they can view all of the details for their trip.
- They can click the View Property link to see the details for that property.
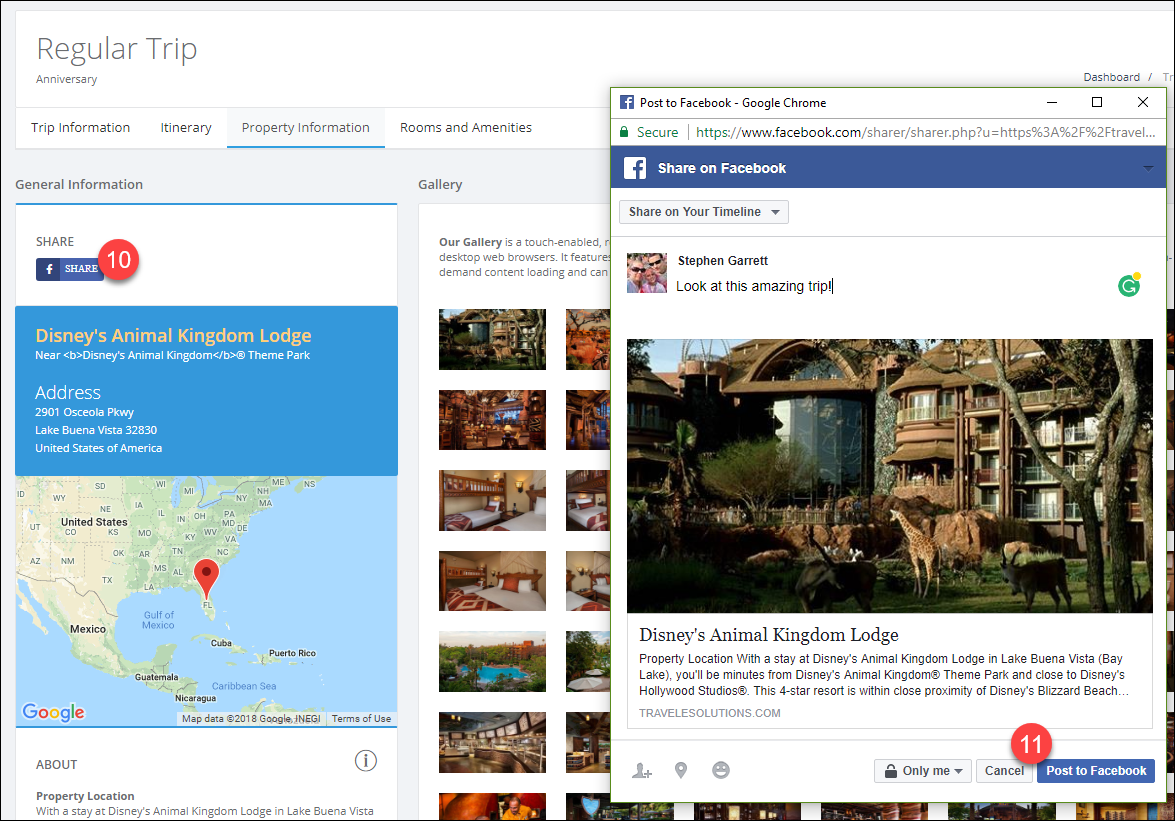
- From the property they can view images and review details, and they can share the information to their social networks.
- We currently support Facebook and will be adding others soon.
Their portal will never share or post anything automatically! - When their friends click through on their post, they will see details about the destination.
They will not see any confidential information about the client or trip.
They will see your contact information!
Related Articles
Client Leads
Referral Groups From the main menu under Client Management, click Client Leads. Click Add Referral Group. In TESS, leads are managed through Referral Groups. A group can be anything that makes sense for the way you manage clients. Events, websites, ...Live Training
Join us in a live webinar to learn more about TESS! Click the links to register for a session. Introduction to TESS In this session, we give an overview of the system for agencies who are new or are considering trying TESS. We cover the basics ...Recorded Webinars and Training
These are recorded versions of some of our training sessions. Check back for udpated videos soon (or keep an eye on our Facebook page and User group. Administration and Agency Management - 12/11/2018 Automation and Client Portals - 8/28/2018 Building ...Creating Clients
Create a Client In the Main Menu click Client Management. Click Clients. Click Add Client. Alternative: click the Quick Links (+) menu then click Add Client/Lead. Enter first and last name (required) and any other information you have available. ...Relationships and Credit Cards
Add Relatives Click Client Management in the Main Menu then click Clients. Search for your client in the fields at the top of each column if needed. Click on the Client Name you want to manage. Click Add Relative. Choose the Relationship type. Type ...