Create a Trip Extension
Start Your Extension
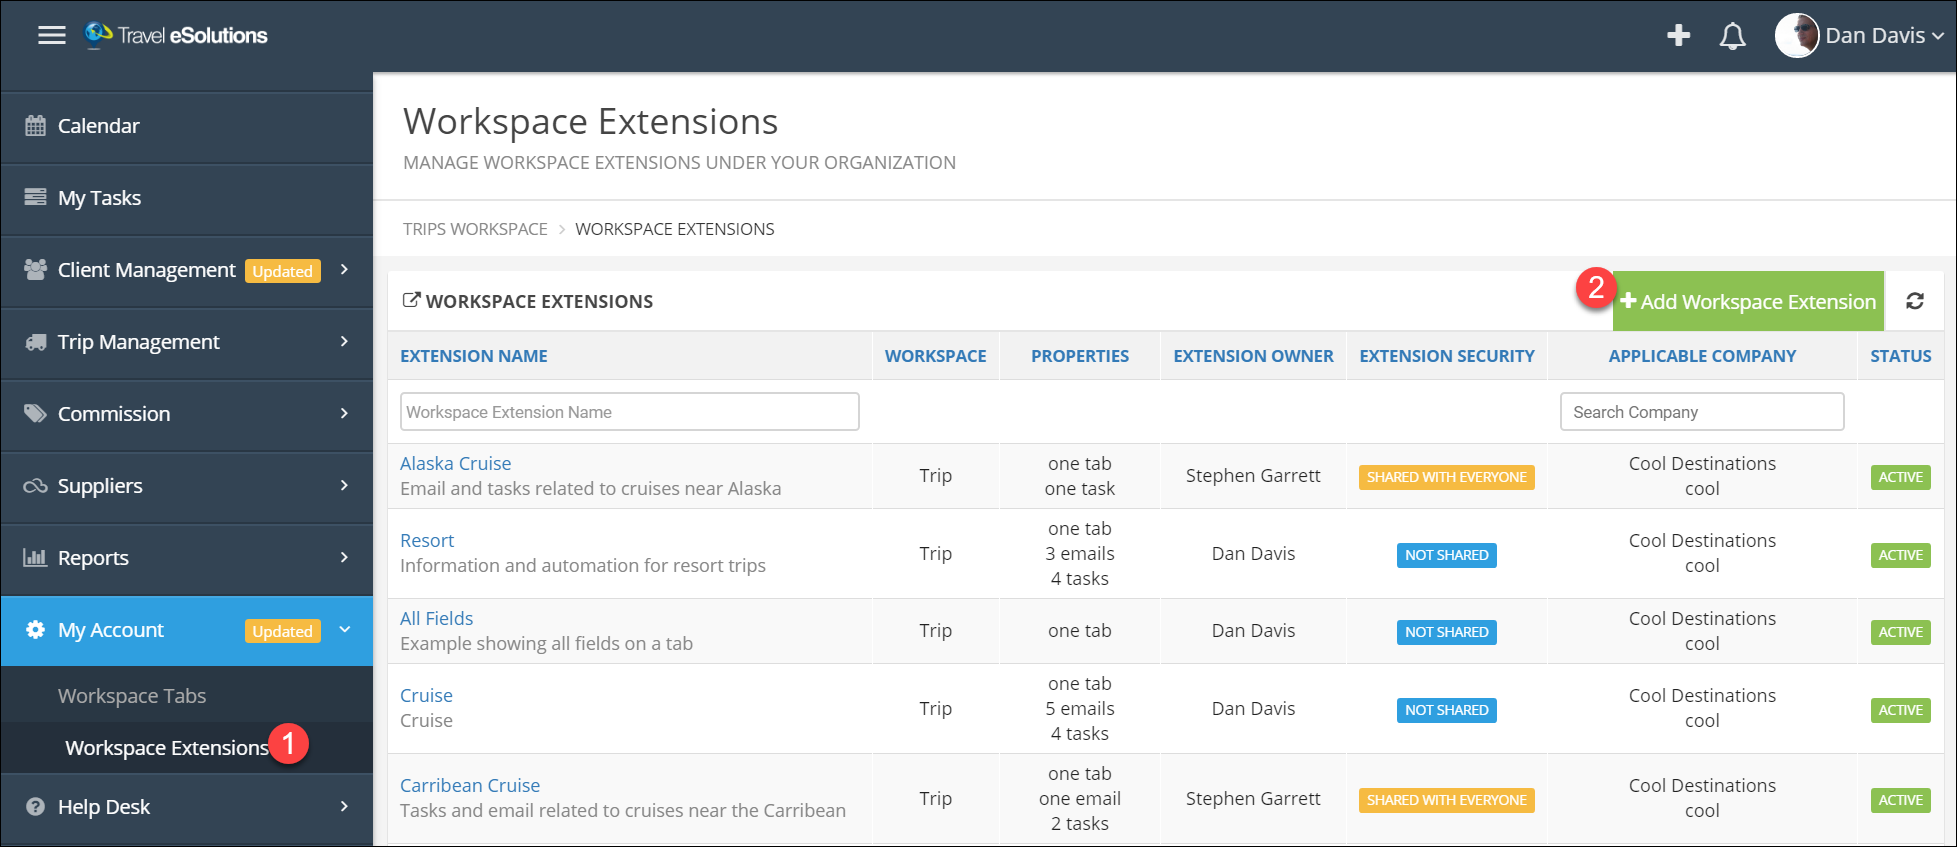
- From the main menu under My Account, click Workspace Extensions.
- Click Add Workspace Extension.
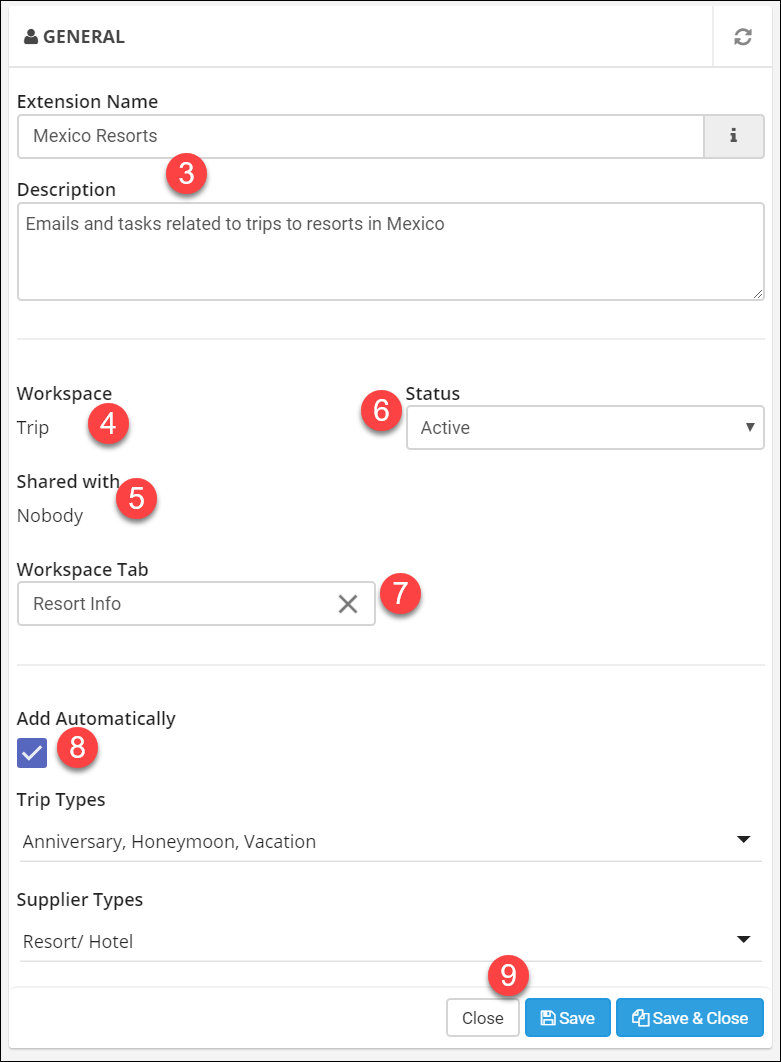
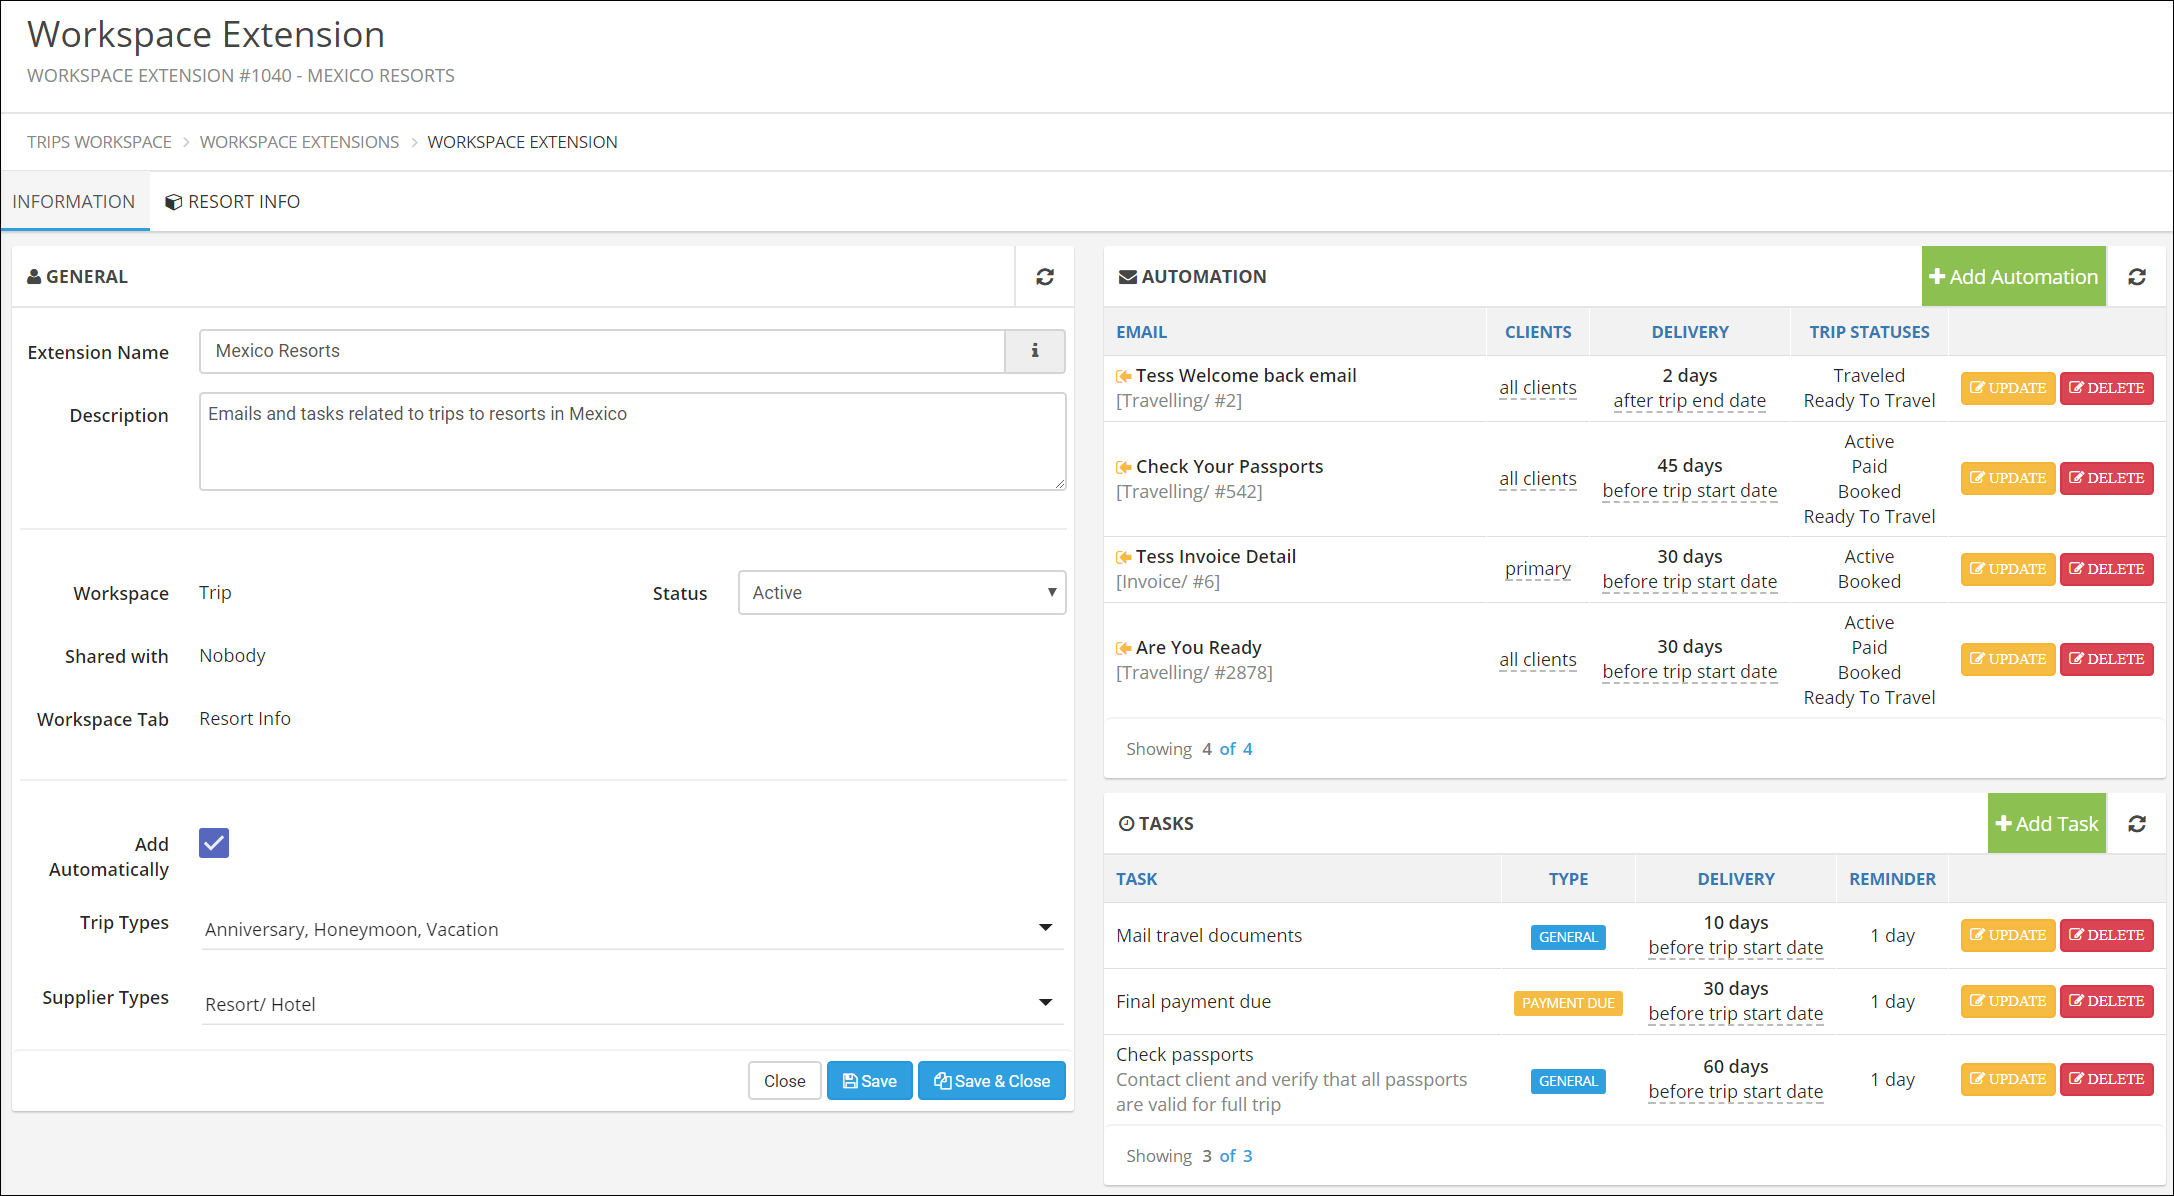
- Name your Extension.
You can have as many Extensions as you want and may have more than one on a trip so be sure to give them useful names.
Give add a description as well for reference later. - Choose Trip as the workspace type.
There are other types of extensions, but this page is specific to Trip Extensions. - If you are an administrator for your company you can choose whether to share the extension with others.
- Set the status to Active.
- (optional) Select a Tab.
You can only have one Tab for each extension, but you can have multiple extensions on a trip. - If you want the Extension to be added to trips automatically, select one or more Trip Type and one or more Supplier Type.
- Click Save.
Add Email Automation (Advanced Package)
Trip Extensions with Tabs and Tasks are included in the Standard TESS package, but email automation is part of the Advanced Package.
If you are on the Standard package, you can still use Extensions that have email automation to take advantage of Tabs and Tasks.
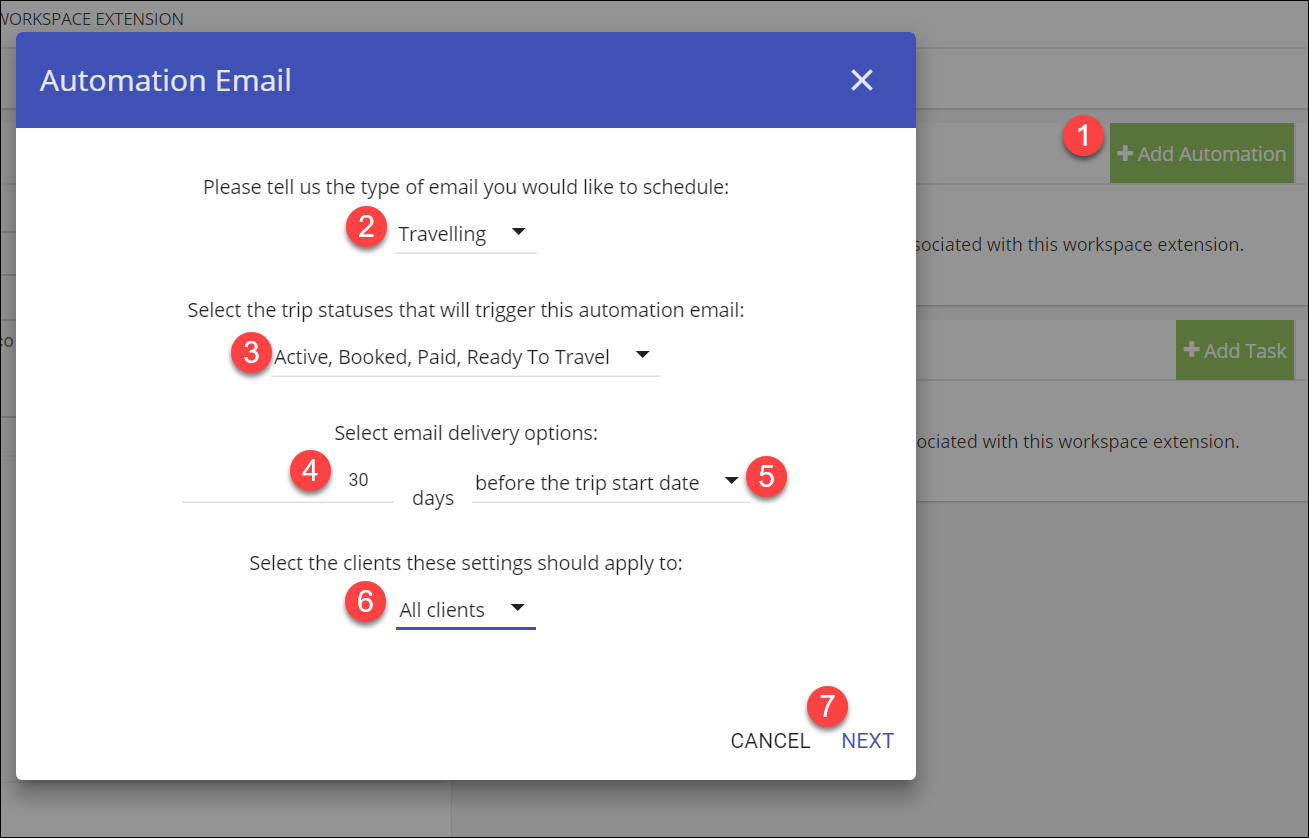
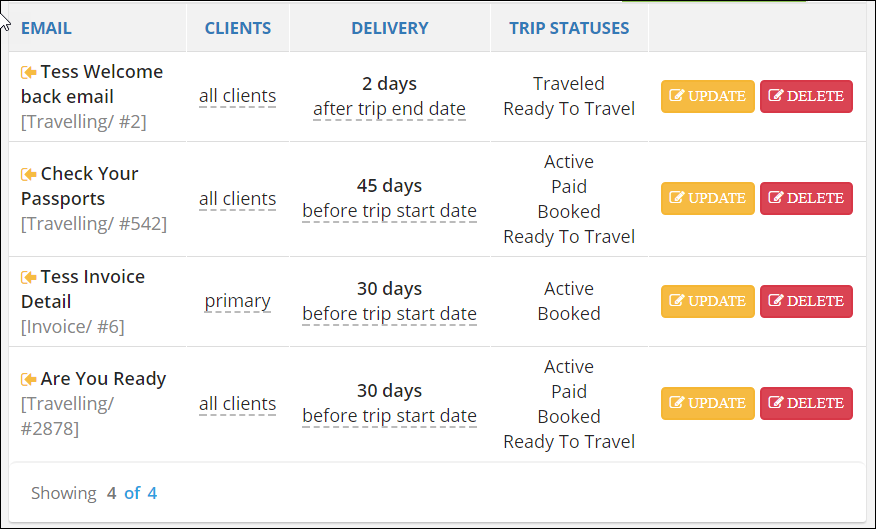
- Click Add Automation.
- Choose the Automation Type:
Use Invoice to send emails that will contain booking financial information.
Use Traveling for all other Trip-related emails. - Choose the Status types that will allow the email to be sent.
For example, you may not want to send an invoice to trips that are in the Paid status. - Choose the number of days to calculate the send date.
- Choose whether the email will be sent that number of days before the trip start date, after the trip end date, or after email activation.
You can think of the "After Activation" option sort of like "As soon as possible". Once all of the pieces are in place to be able to send the email.
You might use this option to send a "Thank you for booking" email, or something similar that is not tied to the travel dates. - Choose whether to send to all clients on the trip or only primary clients.
Invoices are typically only sent to primary clients. - Click Next.
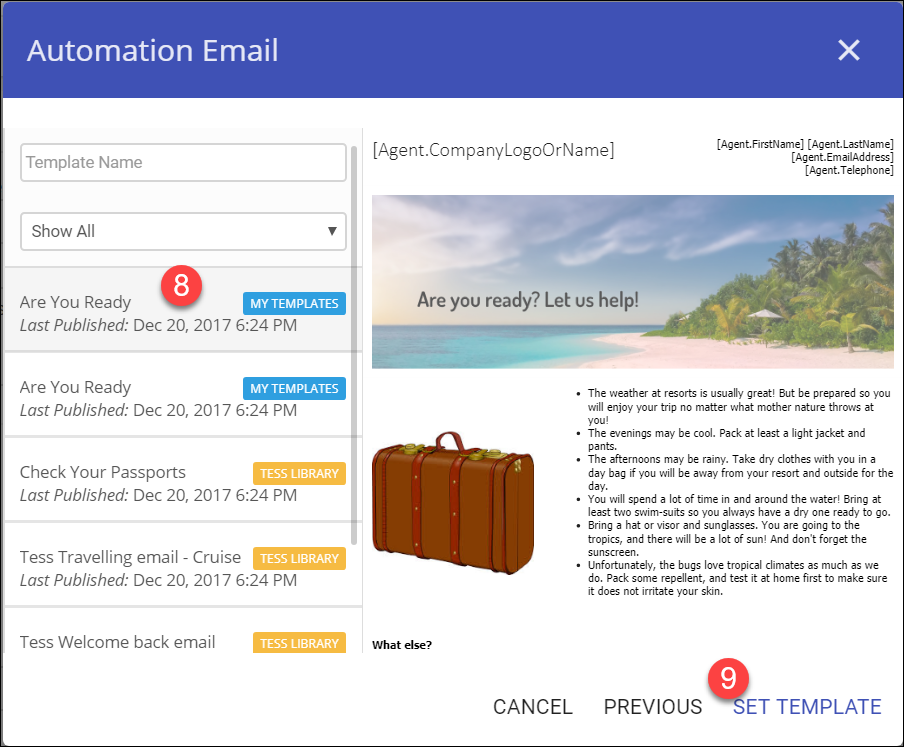
- Click the template you want to use in the list. You can type the template name in the search box if it isn't near the top of the list.
The template will be previewed in the panel on the right. - Click Set Template.
Repeat this process to add as many email automation items to the extension as you'd like.
Add Tasks
Adding tasks is similar to adding Email Automation, just a little simpler because you do not have a template or recipients.
Remember that these tasks are just for you, your clients will not see them.
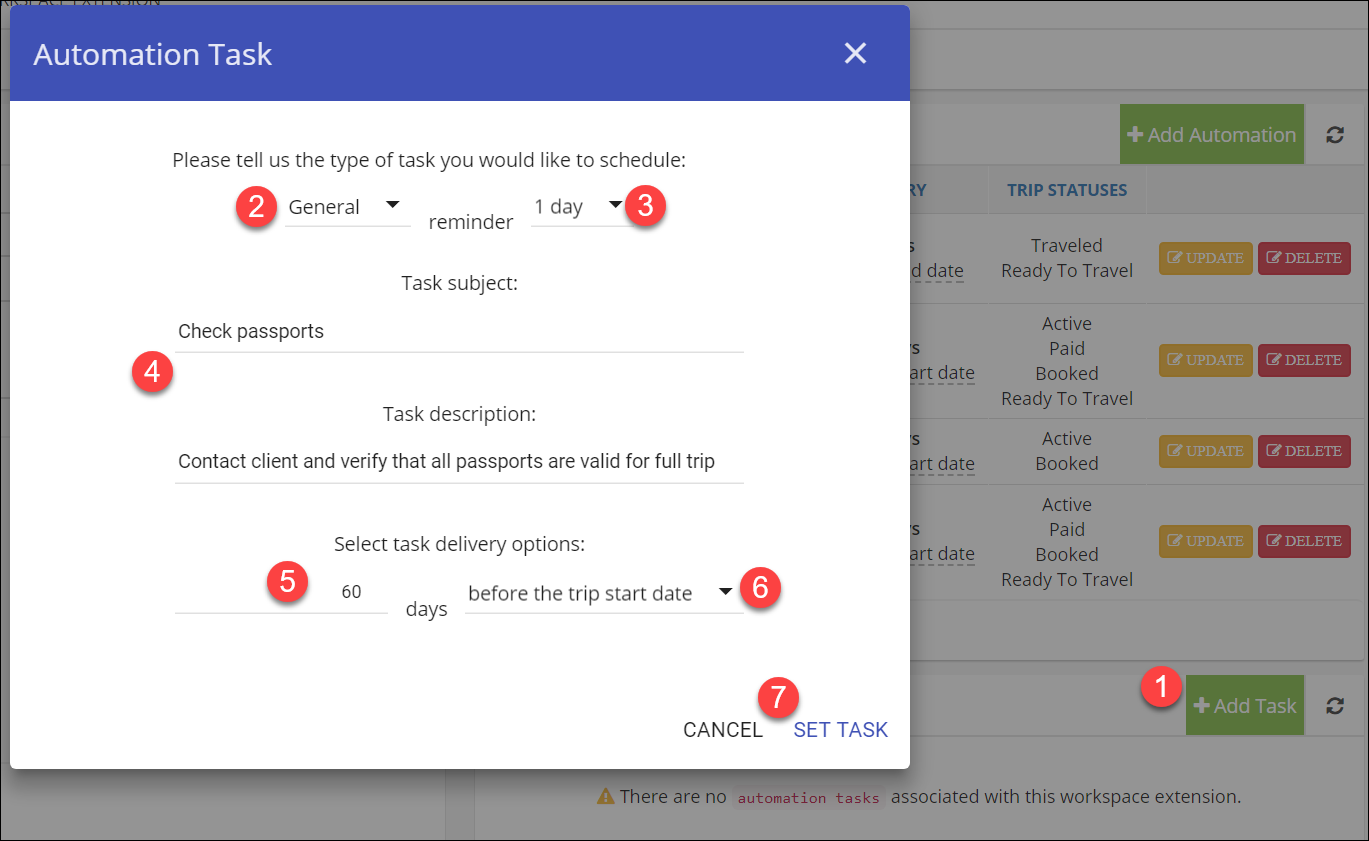
- Click Add Task.
- Choose the task type, General or Payment Due.
This is just for filtering or reporting later. - Choose the number of days before the due date you will receive a reminder.
You will only receive one email reminder per day with a list of tasks. - Enter a task subject and description.
- Enter the number of days for the due date calculation.
- Choose whether the due date will be based on the trip start date, trip end date, or task activation
Like email automation, you can think of Task Activation option as "ASAP". - Click Set Task
Repeat this process to add as many tasks to the extension as you'd like.
Related Articles
Trip Extensions
Add an Automatic Extension to a Trip In this section, we can see that the extension we created was added automatically because the trip is a vacation and a resort. This configuration is specific to one of our demo companies; your settings will be ...Trip Basics
Start a Trip Click Trip Management. Click Trips to view your full list of trips. Click the green and white plus icon (+). Choose Regular Trip. Trip Types The trip type is used for reporting and can be used to trigger some types of automation. Don't ...Live Training
Join us in a live webinar to learn more about TESS! Click the links to register for a session. Introduction to TESS In this session, we give an overview of the system for agencies who are new or are considering trying TESS. We cover the basics ...Trip Tabs
Tab Options This is an example Tab, just showing the different types of fields available on a Tab. You will choose the name for your tabs and the fields. Tabs are organized into Widgets, a tab can have one or more widgets. This example has two ...Frequently Asked Questions
You have questions? We have answers! If your questions isn't here, send it to us!! General Q: Is the system down? A: No. Ok...probably no. We do occasionally take the system down when we are adding new features. Otherwise, it is available 24/7. We ...