Template Editable Widgets
Get Started
Tip
We are using an Invoice for this example, but this can be applied to any email template.
For more details on creating templates review the documentation here: https://docs.trytess.com/automation/traveling-emails/
Information
This training uses features of the Advanced Package in TESS.
To check your subscription level, click on your name in the upper right corner, then click the My Account tab. If you are on the Standard Package, there will be a red “Upgrade” button in the Advanced column. Just click the button to upgrade.
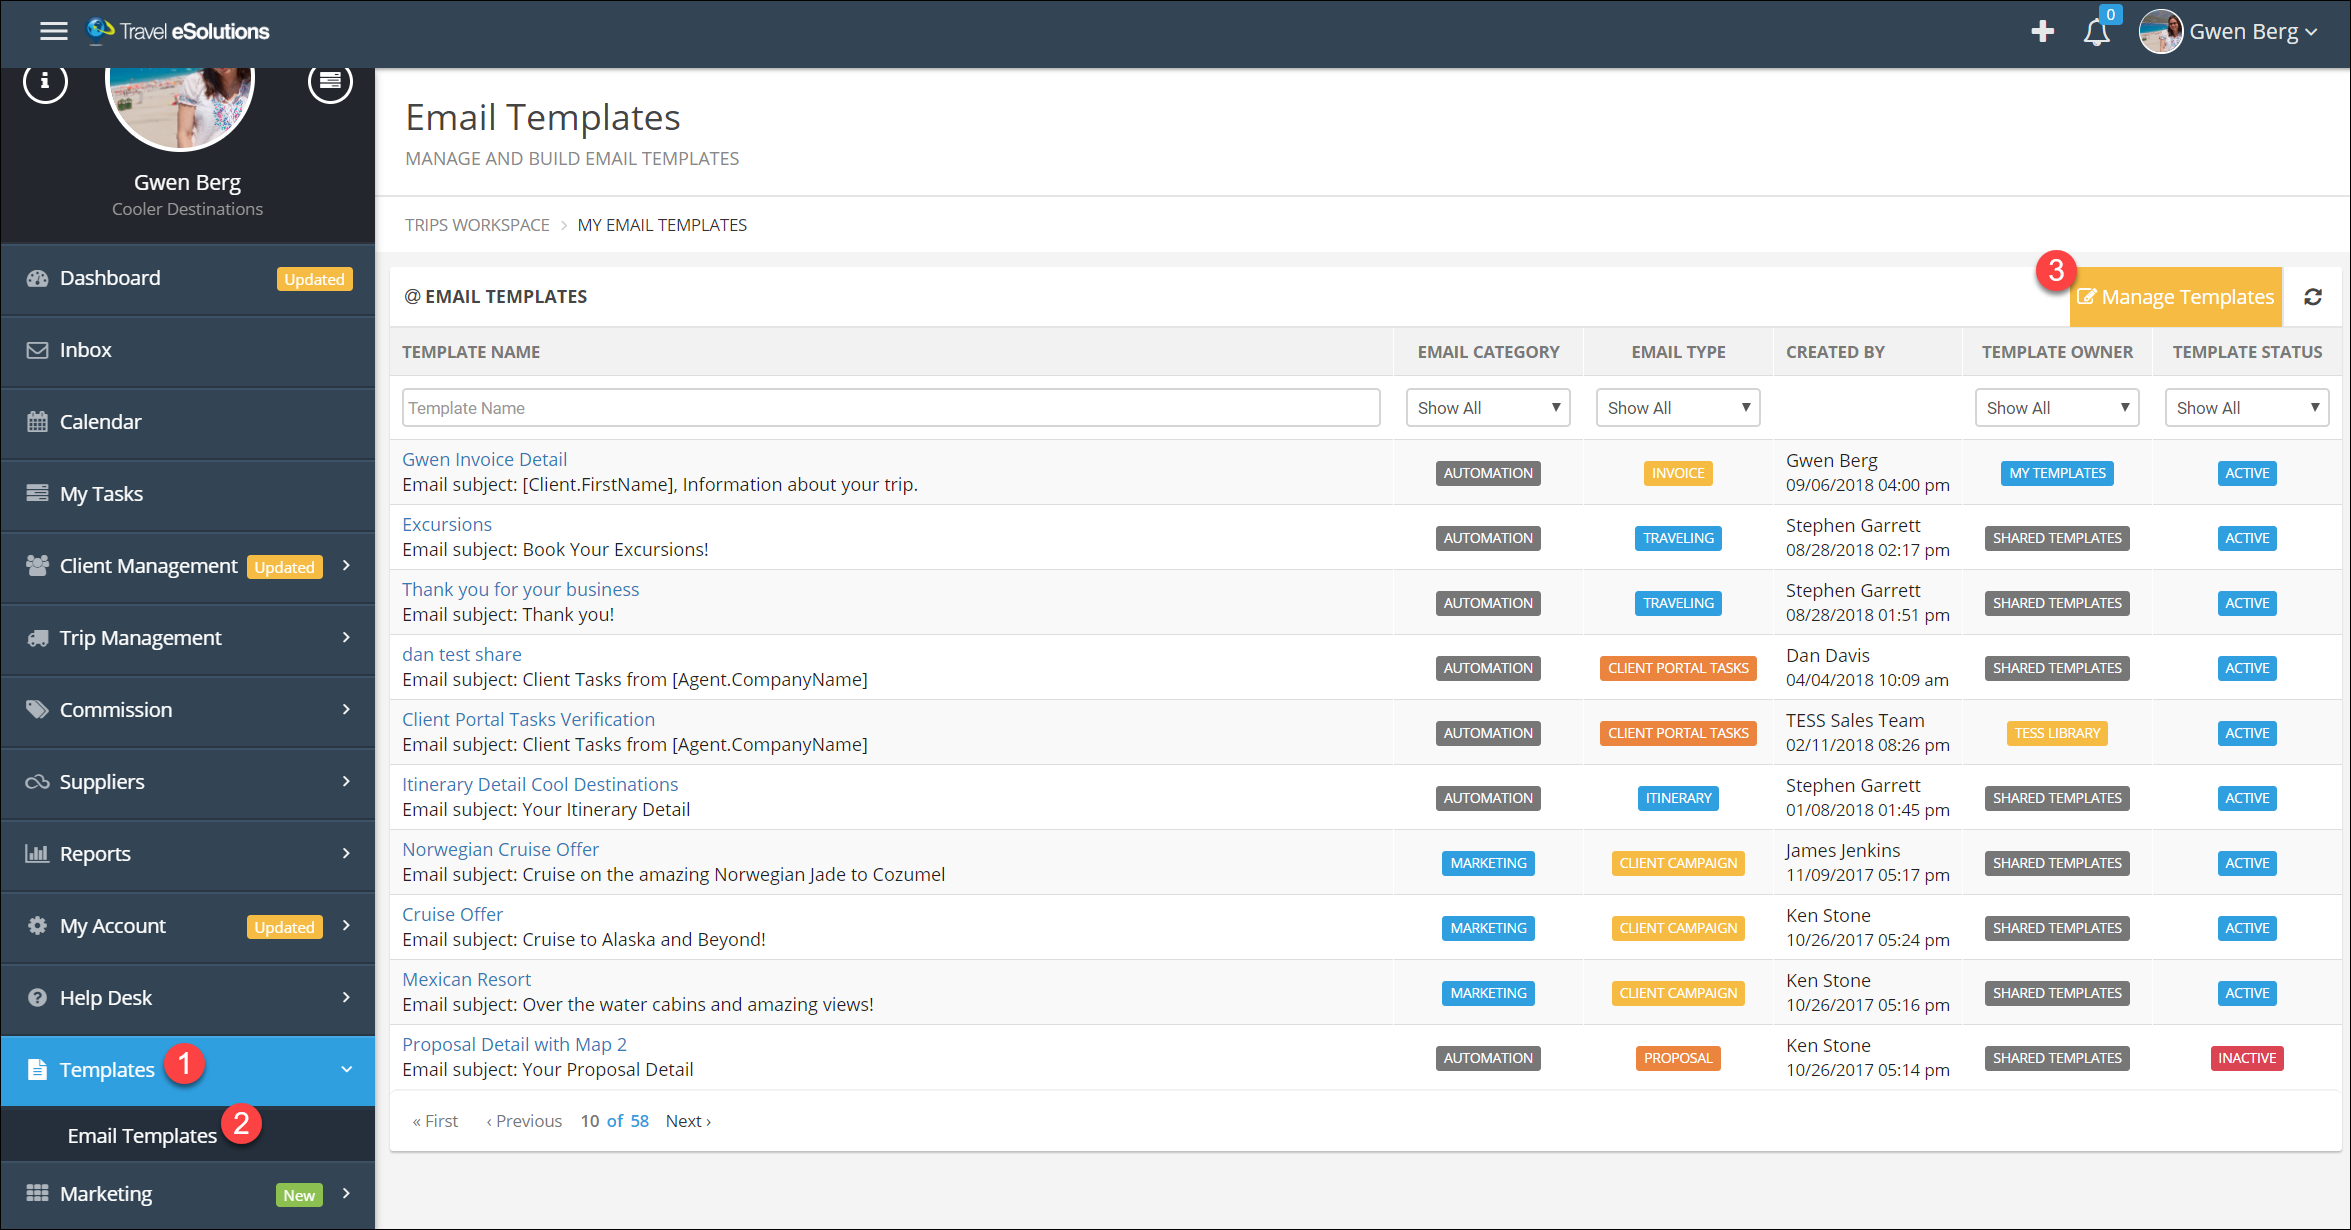
Access the Template Manager
- Click Templates in the Main Menu.
- Click Email Templates.
- Click Manage Templates in the top right corner.
Update a Template
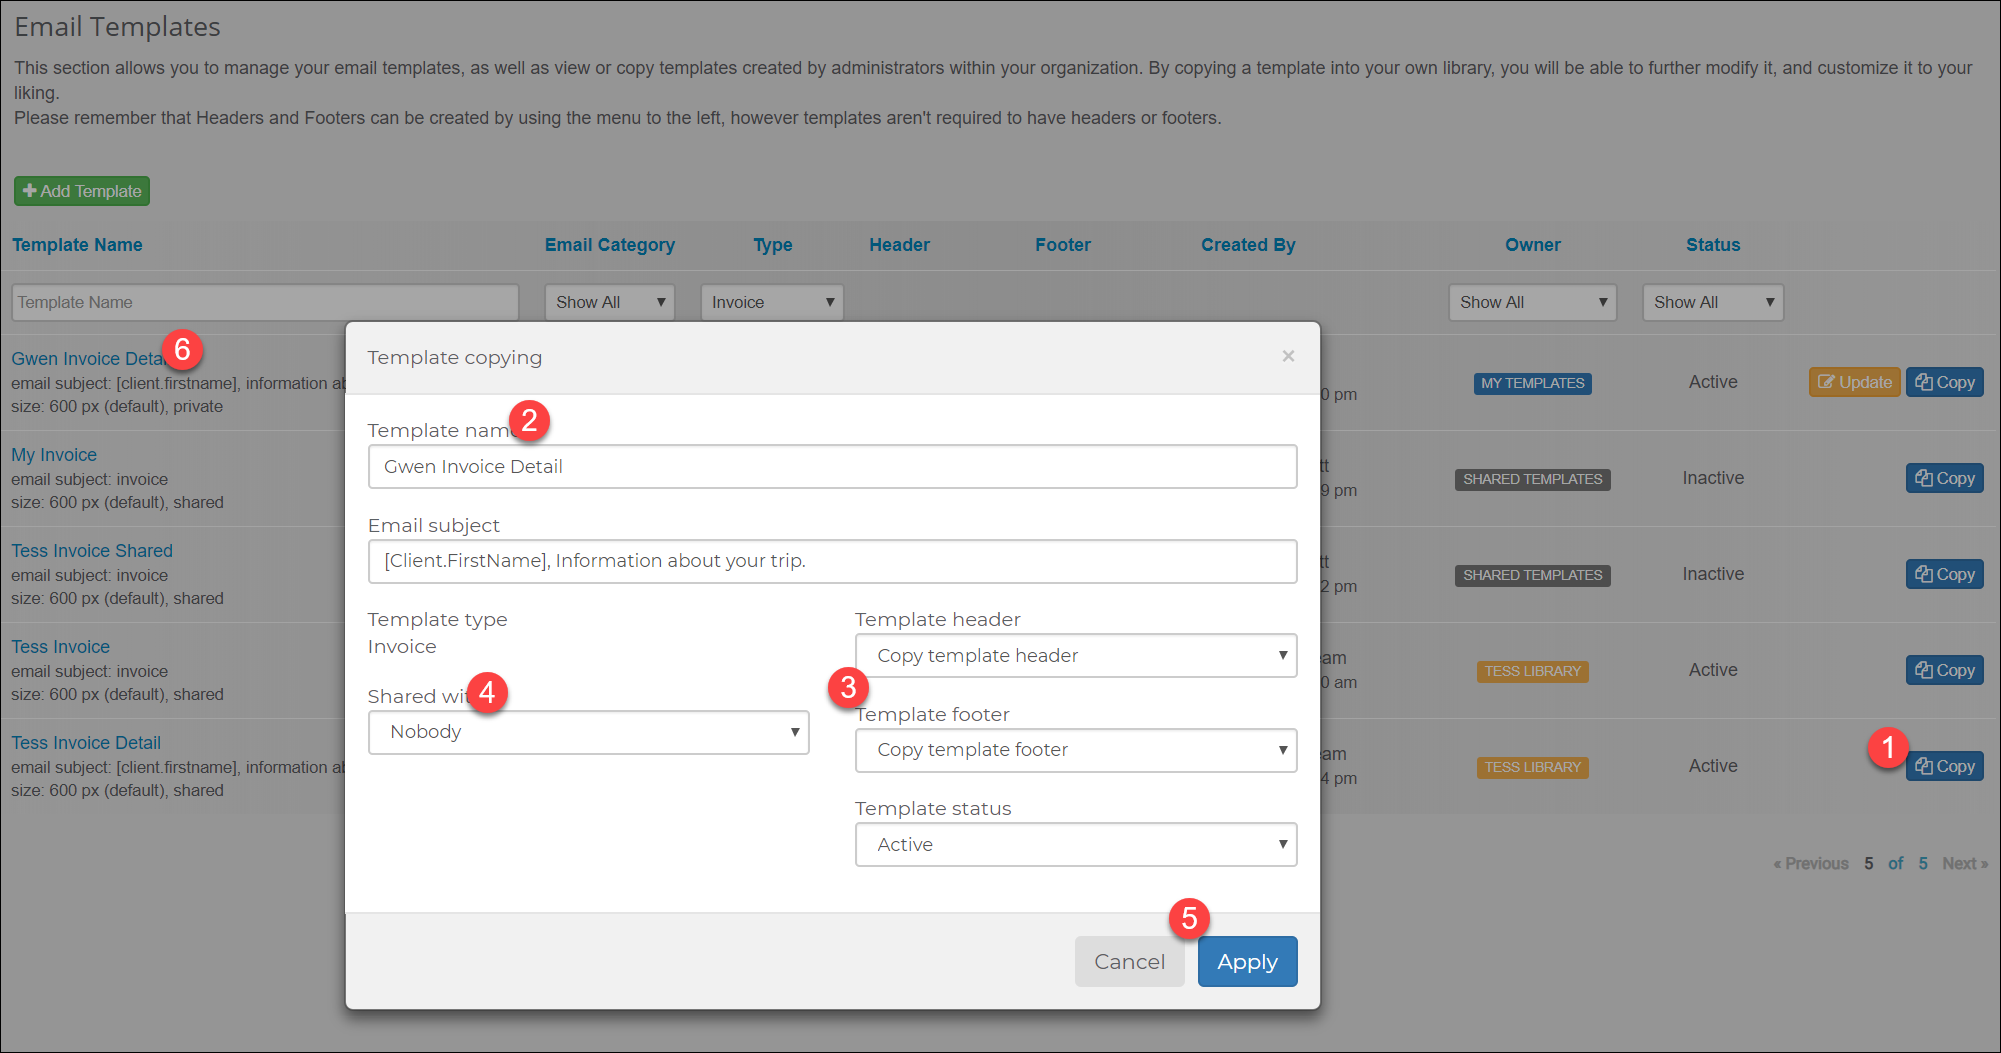
Copy and Customize a Template
- Search for a template you want to modify and click the Copy button.
- Change the name to be specific to you.
- Choose the header and footer you want to use or copy from the original template.
- Choose if you want to share the template.
- Click Save.
- Click the name of the new template in your list to open it for editing.
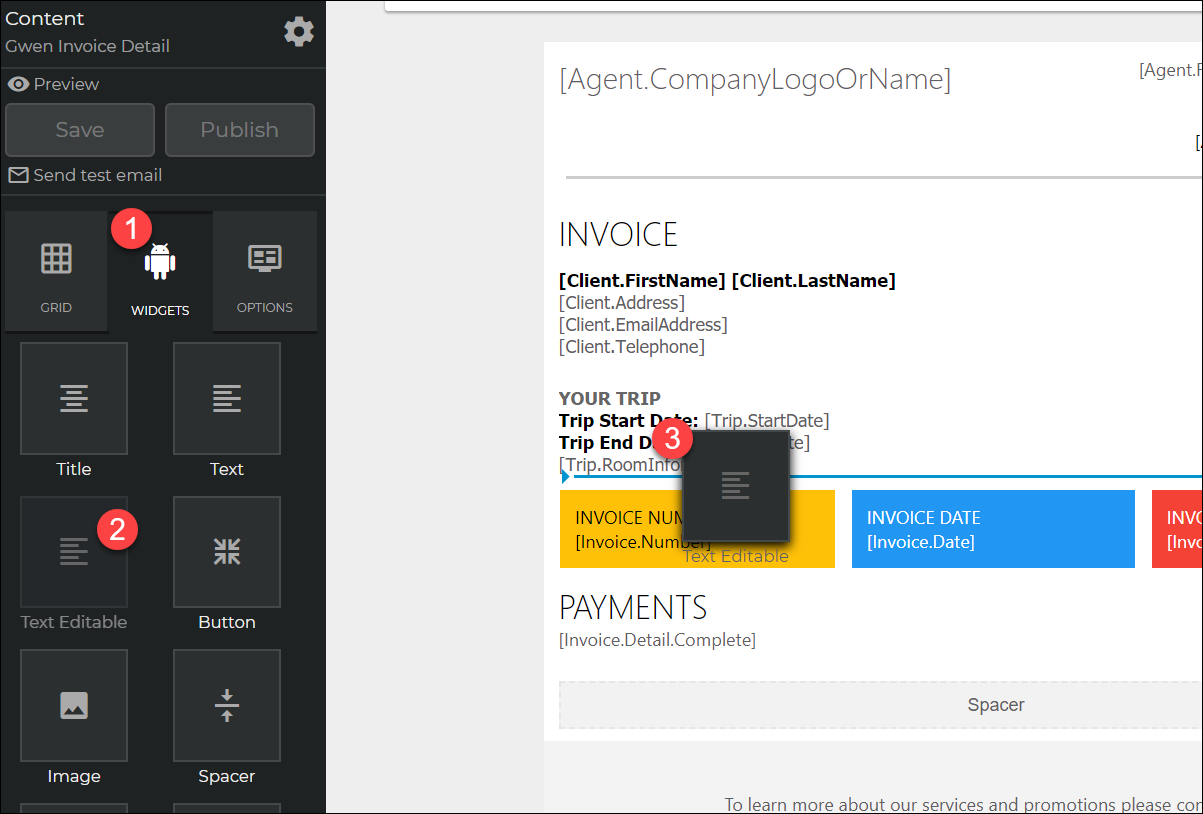
Add Default Text
- Click inside your new widget and replace the example text.
- Click Save when you are complete.
Tip
The main purpose of the editable widget is to allow you to change the text before it is sent to the client.
Make sure the default text is something that would be ok to send to a client, just in case you forget to update it.
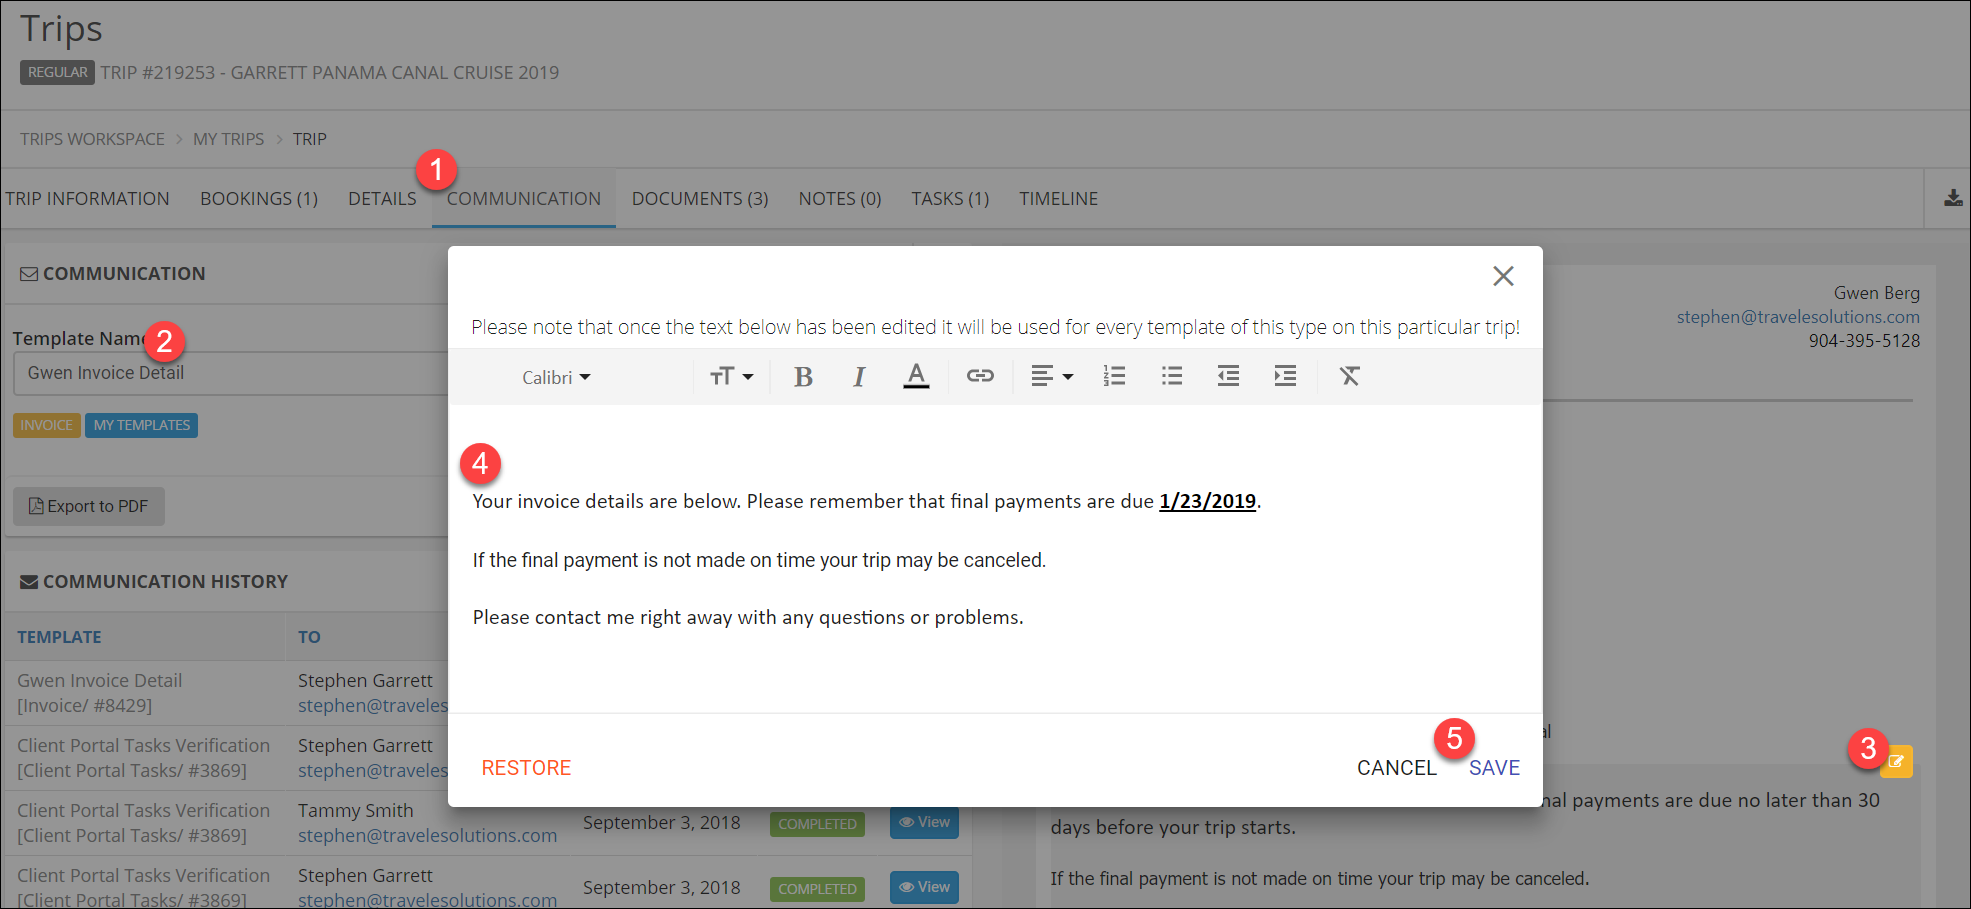
Update for a Trip
Update for a Trip
- Access a trip and click the Communication tab.
- Choose your new or updated template from the list.
- Hover over the new widget area and click the orange edit button.
- Customize the text.
- Click Save.
Success
You have added a widget and customized it for a trip!
You can now send the email immediately by clicking the blue Send button, or you can schedule it to be sent by returning to the Trip Information tab and clicking Schedule Automation Email.
The customizations made in the last set of steps are specific to this trip. This template in any other trip will use the default text you added earlier in the process.
Related Articles
Traveling Emails
Tip: This section gives you step by step instructions to create a header, footer, and email template. You can take a short-cut by simply copying a template that is close to what you want and modifying it. Remember that we are showing you how to ...Trip Tabs
Tab Options This is an example Tab, just showing the different types of fields available on a Tab. You will choose the name for your tabs and the fields. Tabs are organized into Widgets, a tab can have one or more widgets. This example has two ...Importing and Exporting Clients
Step 1: Import Clients From your client list, click the Import/Export button in the upper right corner. Click Import Clients. Download the TESS template, or use your own. When your template is ready, drag and drop it inside the dotted lines, or click ...Create a Trip Extension
Start Your Extension From the main menu under My Account, click Workspace Extensions. Click Add Workspace Extension. Name your Extension. You can have as many Extensions as you want and may have more than one on a trip so be sure to give them useful ...Live Training
Join us in a live webinar to learn more about TESS! Click the links to register for a session. Introduction to TESS In this session, we give an overview of the system for agencies who are new or are considering trying TESS. We cover the basics ...