Trip Basics
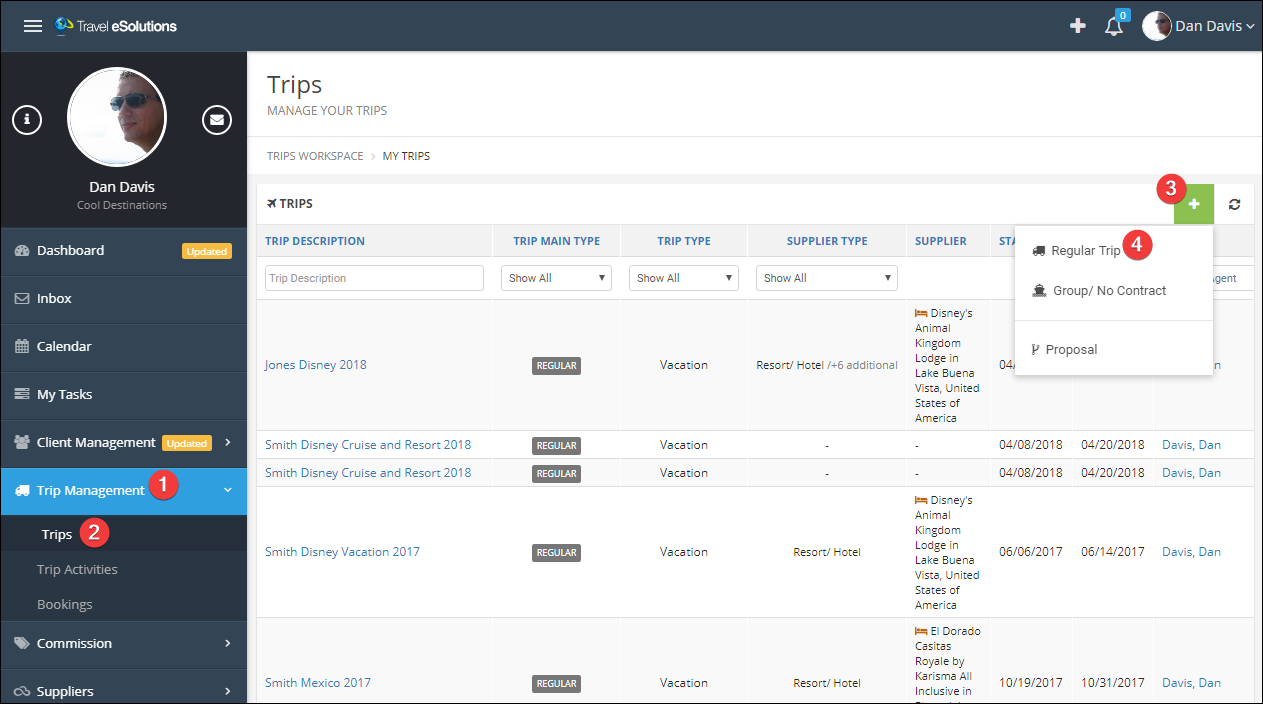
Start a Trip
- Click Trip Management.
- Click Trips to view your full list of trips.
- Click the green and white plus icon (+).
- Choose Regular Trip.
Trip Types
The trip type is used for reporting and can be used to trigger some types of automation. Don't worry; you can change it later!
Trip Start and End Dates
These dates encompass the entire trip, even if some bookings will only be for a portion of the trip.
Trip Description
Use a description that will make it easy to find your trip in a list, and easy to reconcile commissions if the booking numbers do not match. Something like "Jones Disney Cruise 2018".
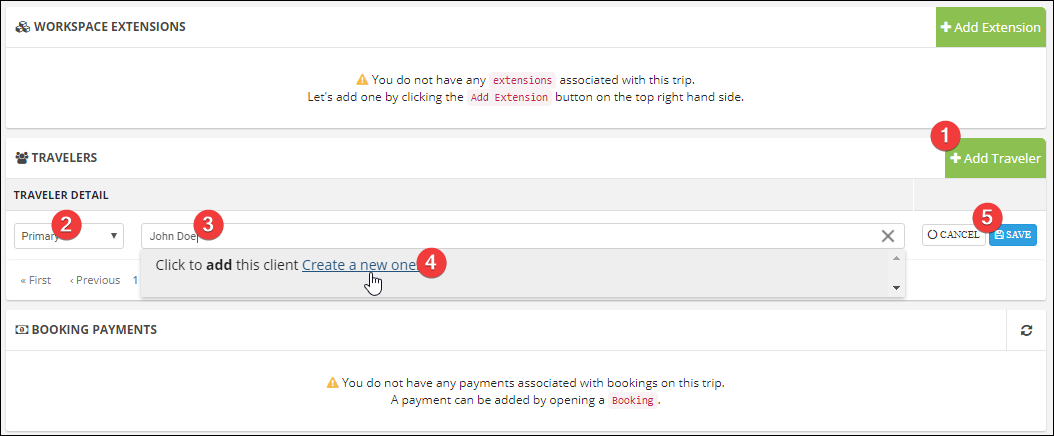
Travelers
- Click Add Traveler.
- Choose Primary or Secondary; you can have multiple of each. The primary traveler is responsible for payments and invoices.
- Enter the client name. TESS will search your client and leads list to populate the information.
- If TESS cannot find the traveler click "Create a new one" and fill out the form.
- Click "Save".
Documents
TESS can store any documents related to this trip. Click the Documents tab, drag and drop a file inside the dotted lines or click "Add Document" to browse for files.
Be sure to click "Upload all"!
Because TESS is available everywhere, you will always have access to these documents and never need to worry about backing them up!
Be sure to click "Upload all"!
Because TESS is available everywhere, you will always have access to these documents and never need to worry about backing them up!
Notes
Go to the Notes tab to enter notes related to this trip. This can replace paper notebooks or other ways to track information. It is particularly helpful if you have a partner or agency owner who may need to to help your clients when you are on vacation yourself!
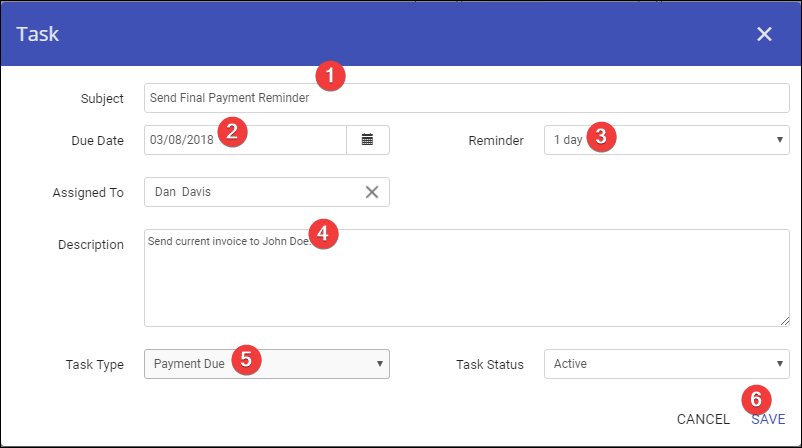
Tasks
In the Trip Extensions section, you can learn how to automate tasks, but you can also create tasks manually from the Tasks tab.
Click "Add Task" to get started. These are tasks for you; your client will not see them.
- Enter a task subject.
- Enter the due date.
- Enter the number of days before the due date that you would like to receive a reminder.
- Enter more details in the description (optional).
- Enter the task type (General or Payment Due).
- Click Save.
Click "Add Task" to get started. These are tasks for you; your client will not see them.
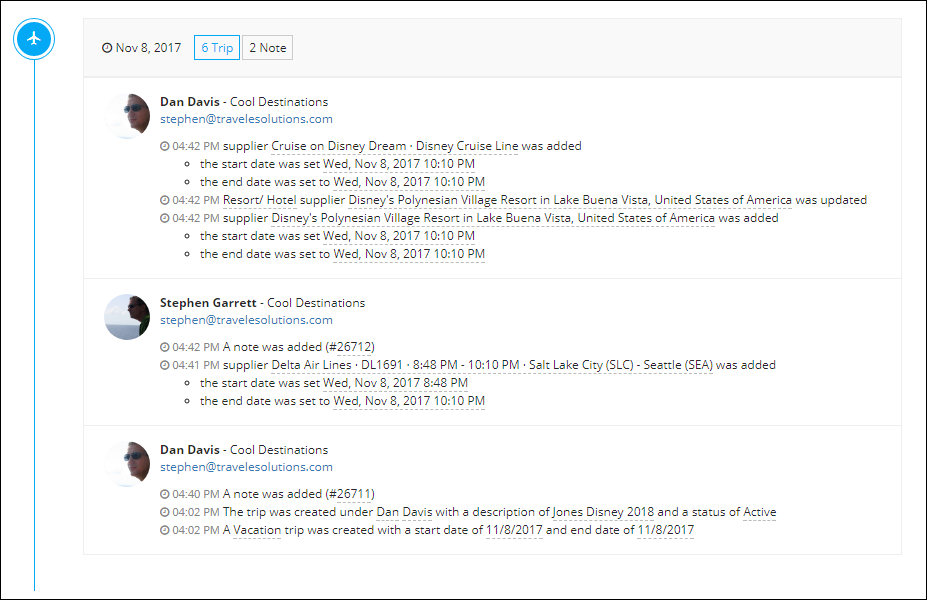
Timeline
As you have been making changes, TESS has been keeping track of everything for you! You can see when changes were made and who made them, making it very easy to review what has happened on a trip.
Related Articles
Trip Extensions
Add an Automatic Extension to a Trip In this section, we can see that the extension we created was added automatically because the trip is a vacation and a resort. This configuration is specific to one of our demo companies; your settings will be ...Create a Trip Extension
Start Your Extension From the main menu under My Account, click Workspace Extensions. Click Add Workspace Extension. Name your Extension. You can have as many Extensions as you want and may have more than one on a trip so be sure to give them useful ...Live Training
Join us in a live webinar to learn more about TESS! Click the links to register for a session. Introduction to TESS In this session, we give an overview of the system for agencies who are new or are considering trying TESS. We cover the basics ...Quick Start
Already have an account, client, and booking and just need to record them? Follow these steps! Step 1: Create a Basic Client Complete the first 8 steps. First and Last name are the only required fields, you can come back and add more details later. ...Trip Tabs
Tab Options This is an example Tab, just showing the different types of fields available on a Tab. You will choose the name for your tabs and the fields. Tabs are organized into Widgets, a tab can have one or more widgets. This example has two ...